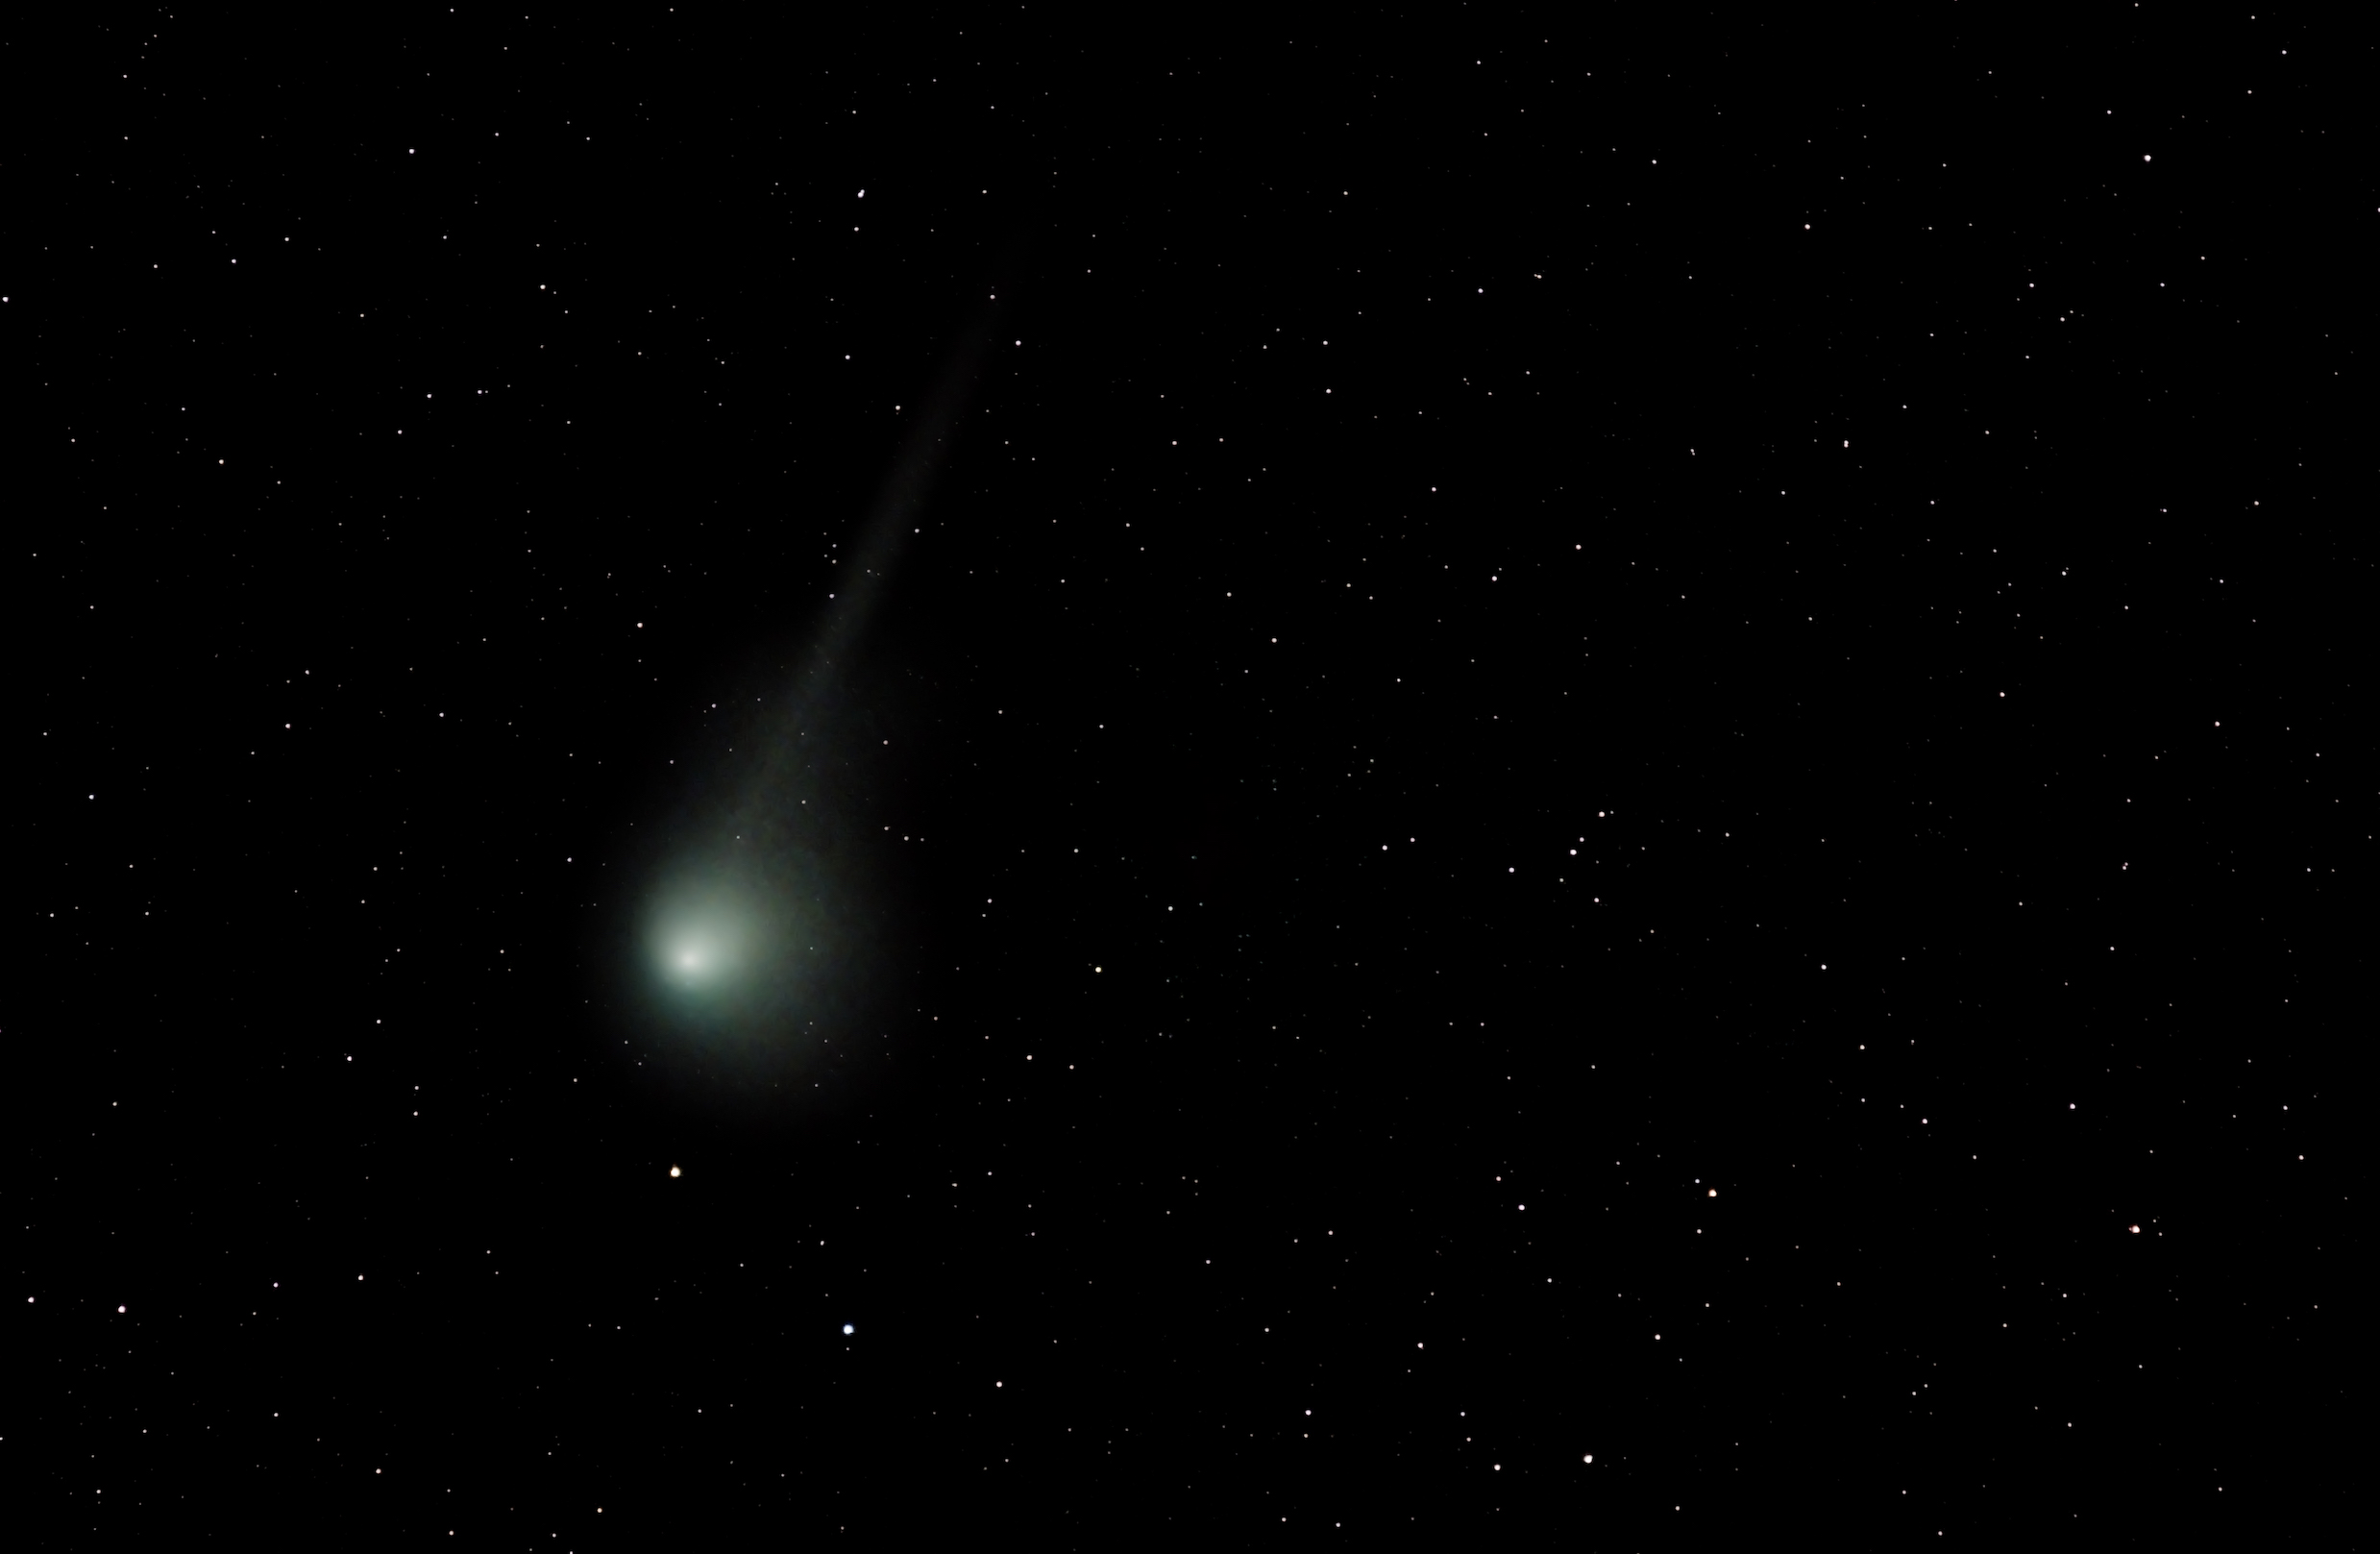
Comet C/2022 E3 (ZTF)
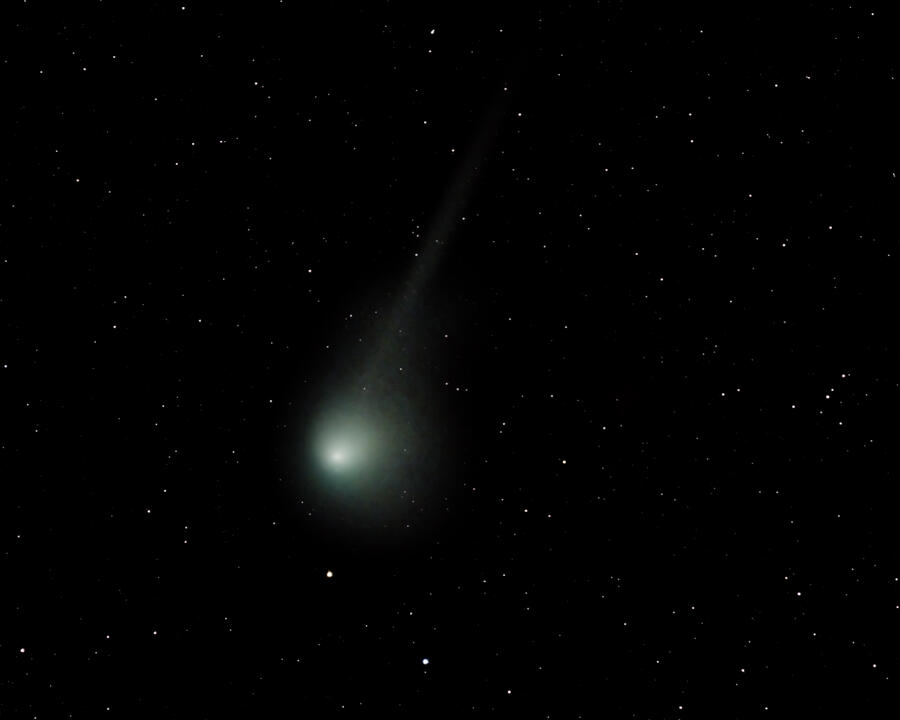 When Comet C/2020 F3 (NEOWISE) was visible to the naked eye in July 2020, I went out to see it. I didn't own a nice camera then and only got a few terrible smartphone shots. Missing out on that opportunity helped motivate me to get a camera and lens. When I heard about this "green" comet I was excited to try to photograph it.
As luck would have it, after a few days of waiting, the clouds finally cleared. On a cold, perfectly clear night a few days ago (at the end of January) I was able to take some photos of comet C/2022 E3 (ZTF).
It was nice and high in the sky, and there weren't any clouds to deal with, but with the quarter moon shining brightly the comet was not visible even with binoculars. Some members from the local astronomy club were at the same location, with their telescopes, and they could barely see it.
I pointed my lens in the general direction of where the comet was. I took a 4-second exposure at ISO 2500, and the widest focal length I could... and there it was! On the little screen on the back of the camera I could see a faint green smudge around a small bright nucleus.
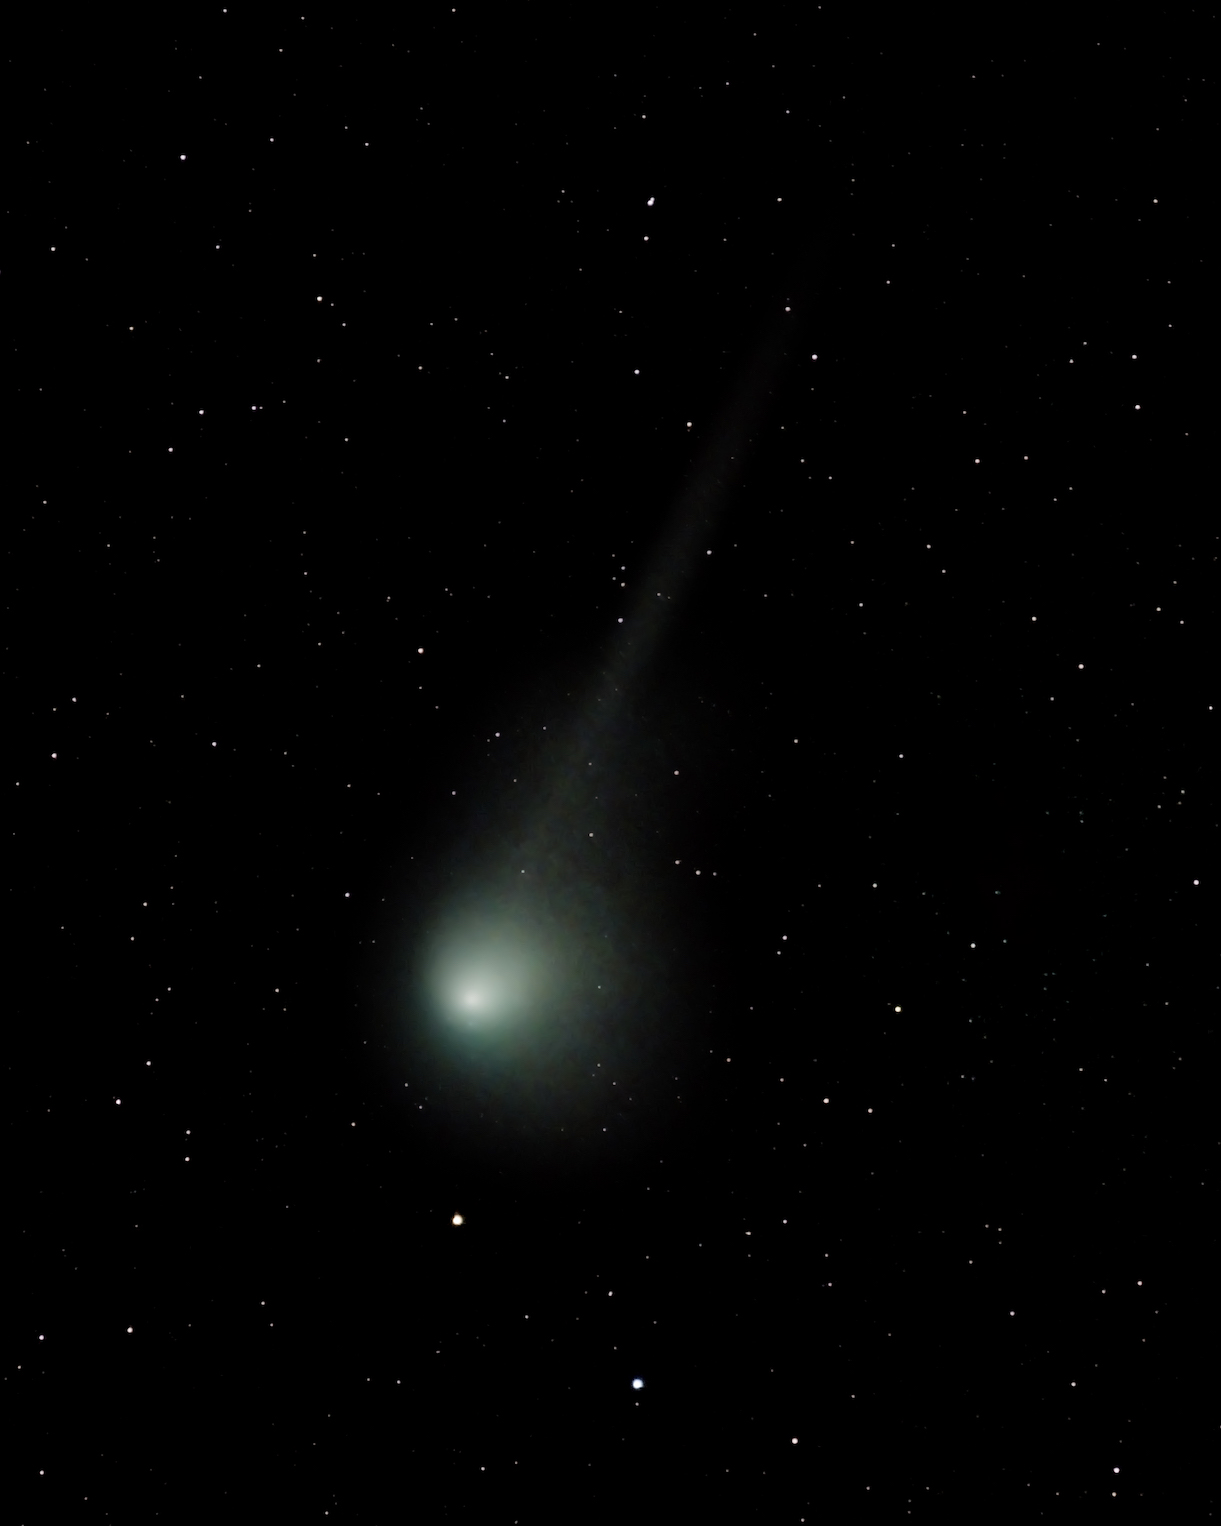
Below is comet C/2022 E3 (ZTF), shot with the Canon EOS R6 and the Sigma 150-600mm Contemporary lens. For this image, I stacked 49 exposures of 2 seconds, taken at 600mm at f/6.3 and ISO 16,000.
Given the low total exposure time (only 98 seconds), and having used no dark, flat, or bias frames, I'm very happy with how this shot turned out.
I've written the steps I followed to process the image. I apologize for the length, sloppiness, and format of these instructions. I figure I won't be processing comet photos very often, so it's probably a good idea to write down what I did. These would have probably been better left as my personal notes! They were based on the Siril comet tutorial. That tutorial was quite good, but assumes you have some experience with the basics of Siril.
Note: Nico Carver just published a great video tutorial on his Nebula Photos channel on YouTube, if you're looking for simpler comet photo processing instructions using DSS.
Aside from Sirli 1.0.6, I used the following software:
- Photoshop to make a composite of stars and comet images,
- starnet++ to remove stars from the comet layer,
- and Stellarium to help plan for my photo and to get the comet's coordinates for use in Siril.
Capturing
For my Canon EOS R6, and Sigma 150-600 Contemporary (EF):
- turn camera IBIS off
- set camera and lens to manual focus
- set the camera to Bulb mode, so the intervalometer can control the shutter
- turn stabilization off on the lens itself
- use electronic shutter to avoid "shutter shock" which would add blur to the exposures
- probably a number of other settings I'm forgetting now
Since I occasionally shoot astro targets, I've saved all my camera's astro settings into a custom shooting mode. I can then just turn the top dial on the camera to put the camera in my custom "astro" mode. The lens on the other hand needs a few switches changed for astro shooting, and I forgot to turn the lens stabilization off... hopefully it didn't soften my images.
Processing with Siril
- folder setup
- create an outer folder to contain the project data
- put photos into "lights" folder in that folder
- if you have darks+flats+biases, create folders for those too and follow the the Siril Manual pre-processing tutorial or use a script
- then, skip down to "create color-calibrated and registered stack"
- otherwise, follow the "pre-processing with only lights" steps for lights only (no flats, darks, or biases)
- pre-processing with only lights
- click Home button in Siril and select that "outer" folder (the one that contains the "lights" folder of your images)
- I ran, using the "Scripts" button, "OSC_Preprocessing_WithoutDBF"
- this took 15 minutes to run, I think
- scripts have to first be downloaded and placed where Siril expects them, you can find them and instructions "OSC_Preprocessing_WithoutDBF"">here
- this does a lot of extra processing (registration and stacking) that we are going to throw away. if this were a normal deep sky object image, not a comet, we wouldn't throw away and the script would save a lot of manual steps.
- for comet processing, after the script completes, we only need the "process/pp_light_*" files. you can probably move all the "process/light_..." and "process/r_pp_..." files into the trash (or just ignore them)
- change home dir to the "process" folder that was created by the script inside that outer folder dir
- create color-calibrated and registered stack
- in "Sequence" tab, click "Search sequences" button
- select "pp_light_.seq"
- this is the sequence of "pre-processed" images, without "registration"
- click "Open Frame List"
- note which frame has been selected as the "best" (with lowest FWHM)
- use the "Open" button to find open that frame's image file in the "process" folder
- this first closes the sequence, so we're now working with only the one image
- make sure you're viewing the frame in "RGB" mode with "AutoStretch" view active
- do Image Processing -> Color Calibration -> Photometric Color Calibration
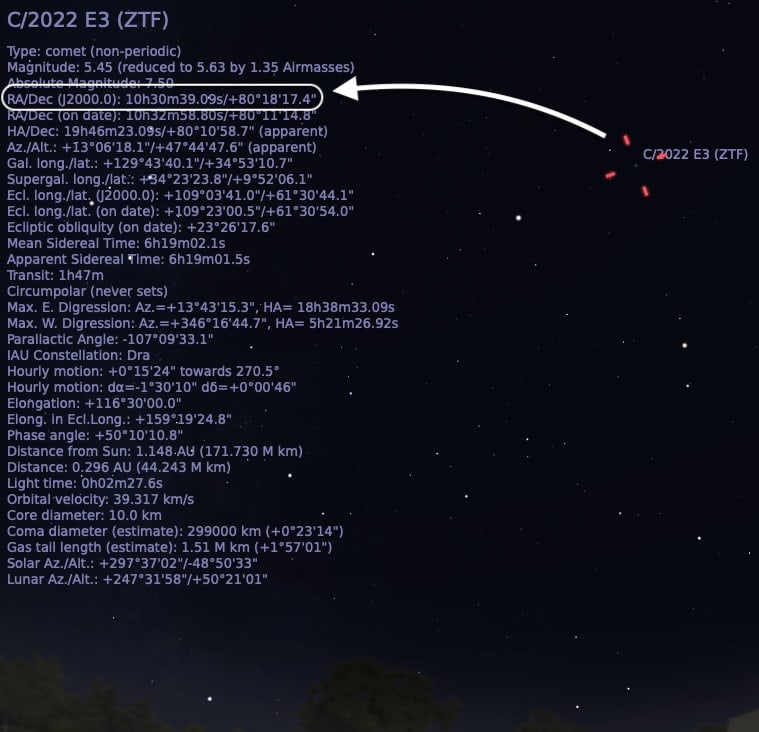
- Stellarium (or other similar tool) can show you the Right Ascention and Declination for the comet at the date+time you shot it (see screenshot below)
- for this comet, on 2023-01-29 at 21:54 UTC-08:00 (Pacitic Time), Stellarium showed the following when I clicked on the comet:
RA/Dec (12000.0): 10h30m39.09s/+80°18'17.4"
- therefore for the "Right Ascension," in the three text boxes there, I entered:
10and30and39.09
- and for "Declination" I entered:
80and18and17.4
- for this comet, on 2023-01-29 at 21:54 UTC-08:00 (Pacitic Time), Stellarium showed the following when I clicked on the comet:
- since I captured the lights with my Canon R6, I was able to click the "Get Metadata From Image" button to set the "Focal distance" and "Pixel size"
- after entering the RA/Dec and image metadata, click the "OK" button
- since the calibration only needs the coordinates of some location in the image, as long as the comet is somewhere in the image (it is) the the calibration can then look up the stars visible in frame and correct the colors in the entire image
- since you're in RGB+AutoStrech view mode, you should see when the image's colors have been corrected
- Stellarium (or other similar tool) can show you the Right Ascention and Declination for the comet at the date+time you shot it (see screenshot below)
- click the "Save" button the save the now color-corrected frame
- stack stars
- in the "Sequence" tab, again open the "pp_light_.seq"
- again, since you're in RGB mode, you should still see the color-corrected frame (since the "best" frame is automatically shown when the sequence is loaded)
- in "Registration" tab
- set "Registration method" of "Global Star Alignment (deep-sky)"
- click "Go register"
- in "Stacking" tab
- set "Sigma low" and "Sigma high" to 1.0
- for stacking the stars, we can remove lots of noise, which is what lowering the sigma values does
- save to "r_pp_light_stacked_global.fit" so we can tell it apart from the separate stack done for the comet we'll be making next
- set "Sigma low" and "Sigma high" to 1.0
- in the "Sequence" tab, again open the "pp_light_.seq"
- stack comet
- in the "Sequence" tab, open the "r_pp_light_.seq"
- this is the sequence that's been registered using the stars, so from frame to frame nothing should be moving except for the comet
- in "Registration" tab
- select "Comet/Asteroid Registration"
- set first registration box
- in the far bottom right of the app, use the frame selector to open the 1st frame
- switch to "Red" or "Green" or "Blue" view
- draw a box around the comet and its coma
- click "Pick object in #1" button
- set last registration box
- in the far bottom right of the app, use the frame selector to open the last frame
- draw a box around the comet and its coma
- click "Pick object in #2" button
- make sure "Accumulate reg. data" box is checked
- click "Go register"
- in "Stacking" tab
1.use "Sigma low" and "Sigma high" of "3.0"
* this shows more detail in comet
* this also shows more star trails, but those are going to be removed anyway from final image
- save to "r_pp_light_stacked_comet.fit"
- in the "Sequence" tab, open the "r_pp_light_.seq"
- do background extraction for the global-stacked frame
- use the "Open" button to open the global/star stacked image, in my case "r_pp_light_stacked_global.fit"
- ensure the view mode (at bottom of the app) is "AutoStretch" to more easily see what's going on
- under "Image Processing" select "Background Extraction..."
- since I used no darks/flats/biases, my image has lots of gradients across it. therefore, I used the "RBF" interpolation method
- do 30 or more samples per line, click "Generate" to create sampling grid
- left-click anywhere a grid point is missing, even near the comet (not directly on a star, if there's a star exactly where a grid point is, click next to the star)
- if we remove some of the comet here that's ok, since this is just the stars background image
- on the other hand, it might be worth saving some of the comet's tail here, if it can be seen in this stars/global stack
- you can compute the background removal, then add/remove points, and repeat this process a few times to ensure you aren't treating part of the comet as background gradient to be removed
- you need to use "Red" or "Green" or "Blue" mode to add/remove grid points
- you can temporarily switch to RGB mode for a better view while adjusting the grid and parameters
- you can adjust the "Smoothing" to try to remove more/fewer swirls of color and such in the background
- after you click "Apply", click the "Save" button near the top right corner of the app to overwrite the file
- you might want to make a copy of the .fit file first before overwriting with this background-extracted version
- do background extraction for the comet-stacked frame
- use the "Open" button to open the global/star stacked image, in my case "r_pp_light_stacked_comet.fit"
- do 30 or more samples per line, click "Generate" to create sampling grid
- left-click anywhere a grid point is missing (not directly on a star, if there's a star exactly where a grid point is, click next to the star)
- right-click to remove grid points where they appear near the comet or its long tail
- you can compute the background removal, then add/remove points, and repeat this process a few times to ensure you aren't treating part of the comet as background gradient to be removed
- you need to use "Red" or "Green" or "Blue" mode to add/remove grid points
- you can temporarily switch to RGB mode for a better view while adjusting the grid and parameters
- you can adjust the "Smoothing" to try to remove more/fewer swirls of color and such in the background
- after you click "Apply", click the "Save" button near the top right corner of the app to overwrite the file
- you might want to make a copy of the .fit file first before overwriting with this background-extracted version
- apply crop and autostretch to both images identically
- in "Conversion" tab, add the two "..._stacked_...fit" files you just did background extraction for
- enter a name like "global-and-comet" and click "Convert" to create and open a sequence of those two images
- we're just making a sequence so we can apply the same image processing steps to both images
- do a crop to remove vignette and areas that weren't covered by all frames
- draw a box, then right-click and select "Crop sequence"
- set the view mode to "AutoStretch"
- use the frame selector (very bottom right corner of app) to ensure you have the comet frame opened
- set the view mode to "Linear"
- under "Image Processing" select "Histogram Transformation" and click the icon that applies the autostretch algorithm, then adjust to your liking
- check the box "Apply to sequence" to apply the same processing to both the stars and comet stacked images
- save the image to TIFF for final work in Photoshop, GIMP, etc
- right click the image and select "Save RGB image to TIFF"
- i used 16-bit and deflate, but i'm not sure about the 16-bit setting
- use the frame selector to open the other image, and save it similarly
- in "Conversion" tab, add the two "..._stacked_...fit" files you just did background extraction for
Continuing with Photoshop
- create a clean stars background image
- prepare to remove stars from background stars layer
- open the "global" registered stars stacked TIFF image written from Siril
- Filter > Noise > Reduce Noise...
- strength: 10
- Preserve Details: 0%
- Reduce Color Noise: 100%
- Sharpen Details: 0%
- duplicate the layer to save
- on "Adjustments" tab, apply a Levels and/or Curves adjustment
- make the stars brighter, both the bright ones and the fainter ones
- the background doesn't matter too much if it's a bit noisy
- on "Adjustments" tab, apply a Levels and/or Curves adjustment
- on "Adjustments" tab, apply a Levels and/or Curves adjustment
- make the stars brighter, both the bright ones and the fainter ones
- the background doesn't matter too much if it's a bit noisy
- shift+option+command+E does a "stamp": creates a duplicate of all visible layers in a new layer
- in the new layer, Filter > Noise > Reduce Noise...
- strength: 10
- Preserve Details: 15%
- Reduce Color Noise: 75%
- Sharpen Details: 0%
- ensure only this stars layer is visible, then File > Save a Copy... to create a 16-bit TIFF ("stars.tif" or something) without layers
- remove stars from background star image
- I downloaded the command-line version of starnet++
- To use the software (I ran it on Ubuntu Linux):
./starnet++ <input_TIFF> <output_TIFF>
- add the resulting image to the Photoshop project as a new layer ABOVE the stars layer you just exported
- on the Properties tab of the new layer, click "Convert to Layers"
- change the blend mode for the new starless-background layer to "Subtract"
- you should now see the previous stars layer but without the background color/noise
- use shift+option+command+E does a "stamp": creates a duplicate of all visible layers in a new layer
- move this new layer you just created to the bottom of the layer stack, then duplicate it to save a copy
- on the layer, use Selection > Color Range... and use "Highlights" from the dropdown menu
- set Fuzziness and Range to select most stars without selecting any remaining background noise pixels
- careful to not select too much, or else some stars' selections won't be circular
- Select > Modify > Expand and do 1 or 2 pixels
- with the stars selected, open the layer "Adjustments" tab and select "Hue/Saturation"
- increase saturation (+70? +75?) to make the stars a bit more colorful
- click on the adjustment mask that's been created in the layers list (or the Masks button below the Properties/Adjustments/Libraries tabs) and give it a few pixels of "feather" if needed
- use shift+option+command+E does a "stamp": creates a duplicate of all visible layers in a new layer
- change blend mode on the starless background layer from Subtract back to Normal, and move it beneath the new more-colorful stars layer
- duplicate the starless layer to save it
- use a healing brush or black or something to paint out most of the bright spot from the comet
- apply a Filter > Blur > Gaussian Blur of radius 20ish pixels to smooth out the background colors
- change the colorful stars-only layer, which should be immediately above this new smoothed starless layer, to use a blend mode of Lighter Color
- use File > Save a Copy to save the final stars background image
- prepare to remove stars from background stars layer
- create a clean comet foreground image
- prepare to remove stars from foreground comet layer
- duplicate the comet layer, in case you mess up
- adjust the curves/levels/etc of the comet layer to get the comet and details as prominent as you want
- apply several rounds of de-noising with Filter > Noise > Reduce Noise...
- I used Reduce Color Noise: 100%
- then I did another couple rounds of denoising to blur the graininess out of the comet
- then I did another round of denoising with a higher "Preserve Details" and "Sharpen Details" setting to make the star smears more prominent
- this could perhaps be skipped? dunno
- ensure only this comet layer is visible, then File > Save a Copy... to create a 16-bit TIFF ("comet.tif" or something) without layers
- remove stars from foreground comet image
- Use the starnet++ again:
./starnet++ <input_TIFF> <output_TIFF>
- add the resulting image to the Photoshop project as a new layer
- Use the starnet++ again:
- use File > Save a Copy to save the final comet foreground image
- prepare to remove stars from foreground comet layer
- open both images as layers
- open the stars background .tif in Photoshop, then drag the comet .tif onto the Photoshop window to open that as a new layer
- ensure the new layer is centered upon the old layer (it should snap into place when close, if not already centered), then hit the Return key
- we need to convert the embedded smart object to a regular layer: click on the layer, then on the right side, under layer "Properties" tab, click "Convert to Layers"
- ensure the comet layer is above the stars layer
- mask out the background of the comet layer
- Layer > Layer Mask > Reveal All
- ensure foreground paint color is black
- use the lasso tool to draw selection around the comet and its coma and tail, leaving plenty of room
- Select > Modify > Expand
- expand the selection quite a bit, maybe 50 or 100 or 150 pixels
- Select > Inverse
- ensure the layer's mask is active, not the layer itself (we're going to paint black there)
- Edit > Fill...
- use foreground/background or wherever you have black
- Select > Deselect
- click on the layer mask, then under the Properties tab on the layer, adjust the masks Feather setting to make the comet layer smoothly blend in with the stars layer
- duplicate the comet layer, in case you mess up
- potentially, use the Polygonal Lasso tool, on a separate copy of the comet layer, to isolate just the long tail of the comet
- final comet smoothing
- the ideal final comet layer should be just smooth color without visible stars or other artifacts
- click the comet layer, so you paint on that and not on its layer mask
- change the comet layer's blend mode from "Normal" to "Lighter Color"
- use the Spot Healing Brush tool
- small, soft brush (size ~20? 15?)
- use Proximity Match
- brush away any remaining smeared stars or other visible spots
- everywhere you see a star with trail, that's a smeared star from the comet-registered stack, which we can "heal" out because all stars will be visible from the stars layer beneath
- you can toggle the comet layer visible/invisible to easily see where stars become smeared and need fixing
- duplicate the comet layer, in case you mess up
- perhaps do another round of denoise, or a subtle blur, for the final smoothing
- if needed, remove the doubled nucleus of the comet (if the comet is still visible in the stars background layer)
- duplicate the stars layer
- use soft black brush to hide the very brightest center pixels of the comet in the stars layer
- change the comet layer blend mode to Lighter Color
- the image should be done!
- use File > Save a Copy to save the final blended image
- open the stars background .tif in Photoshop, then drag the comet .tif onto the Photoshop window to open that as a new layer
More Images
For the photo above, I used a shorter focal length (400mm down from 600) and longer exposures (40 exposures at 8 seconds each, up from 2 seconds) and a much lower ISO of 2,500. The long ion tail was visible in the star-registered stack, so I included it in the final image. The tail probably appears too wide here, since the comet was drifting "up" relative to the stars. Since this image had much more exposure time (500 total seconds, compared to the 98 seconds of the ISO 16,000 images on this page) I'd like to, someday, process this image again with different software to try to get the tail properly dealt with.
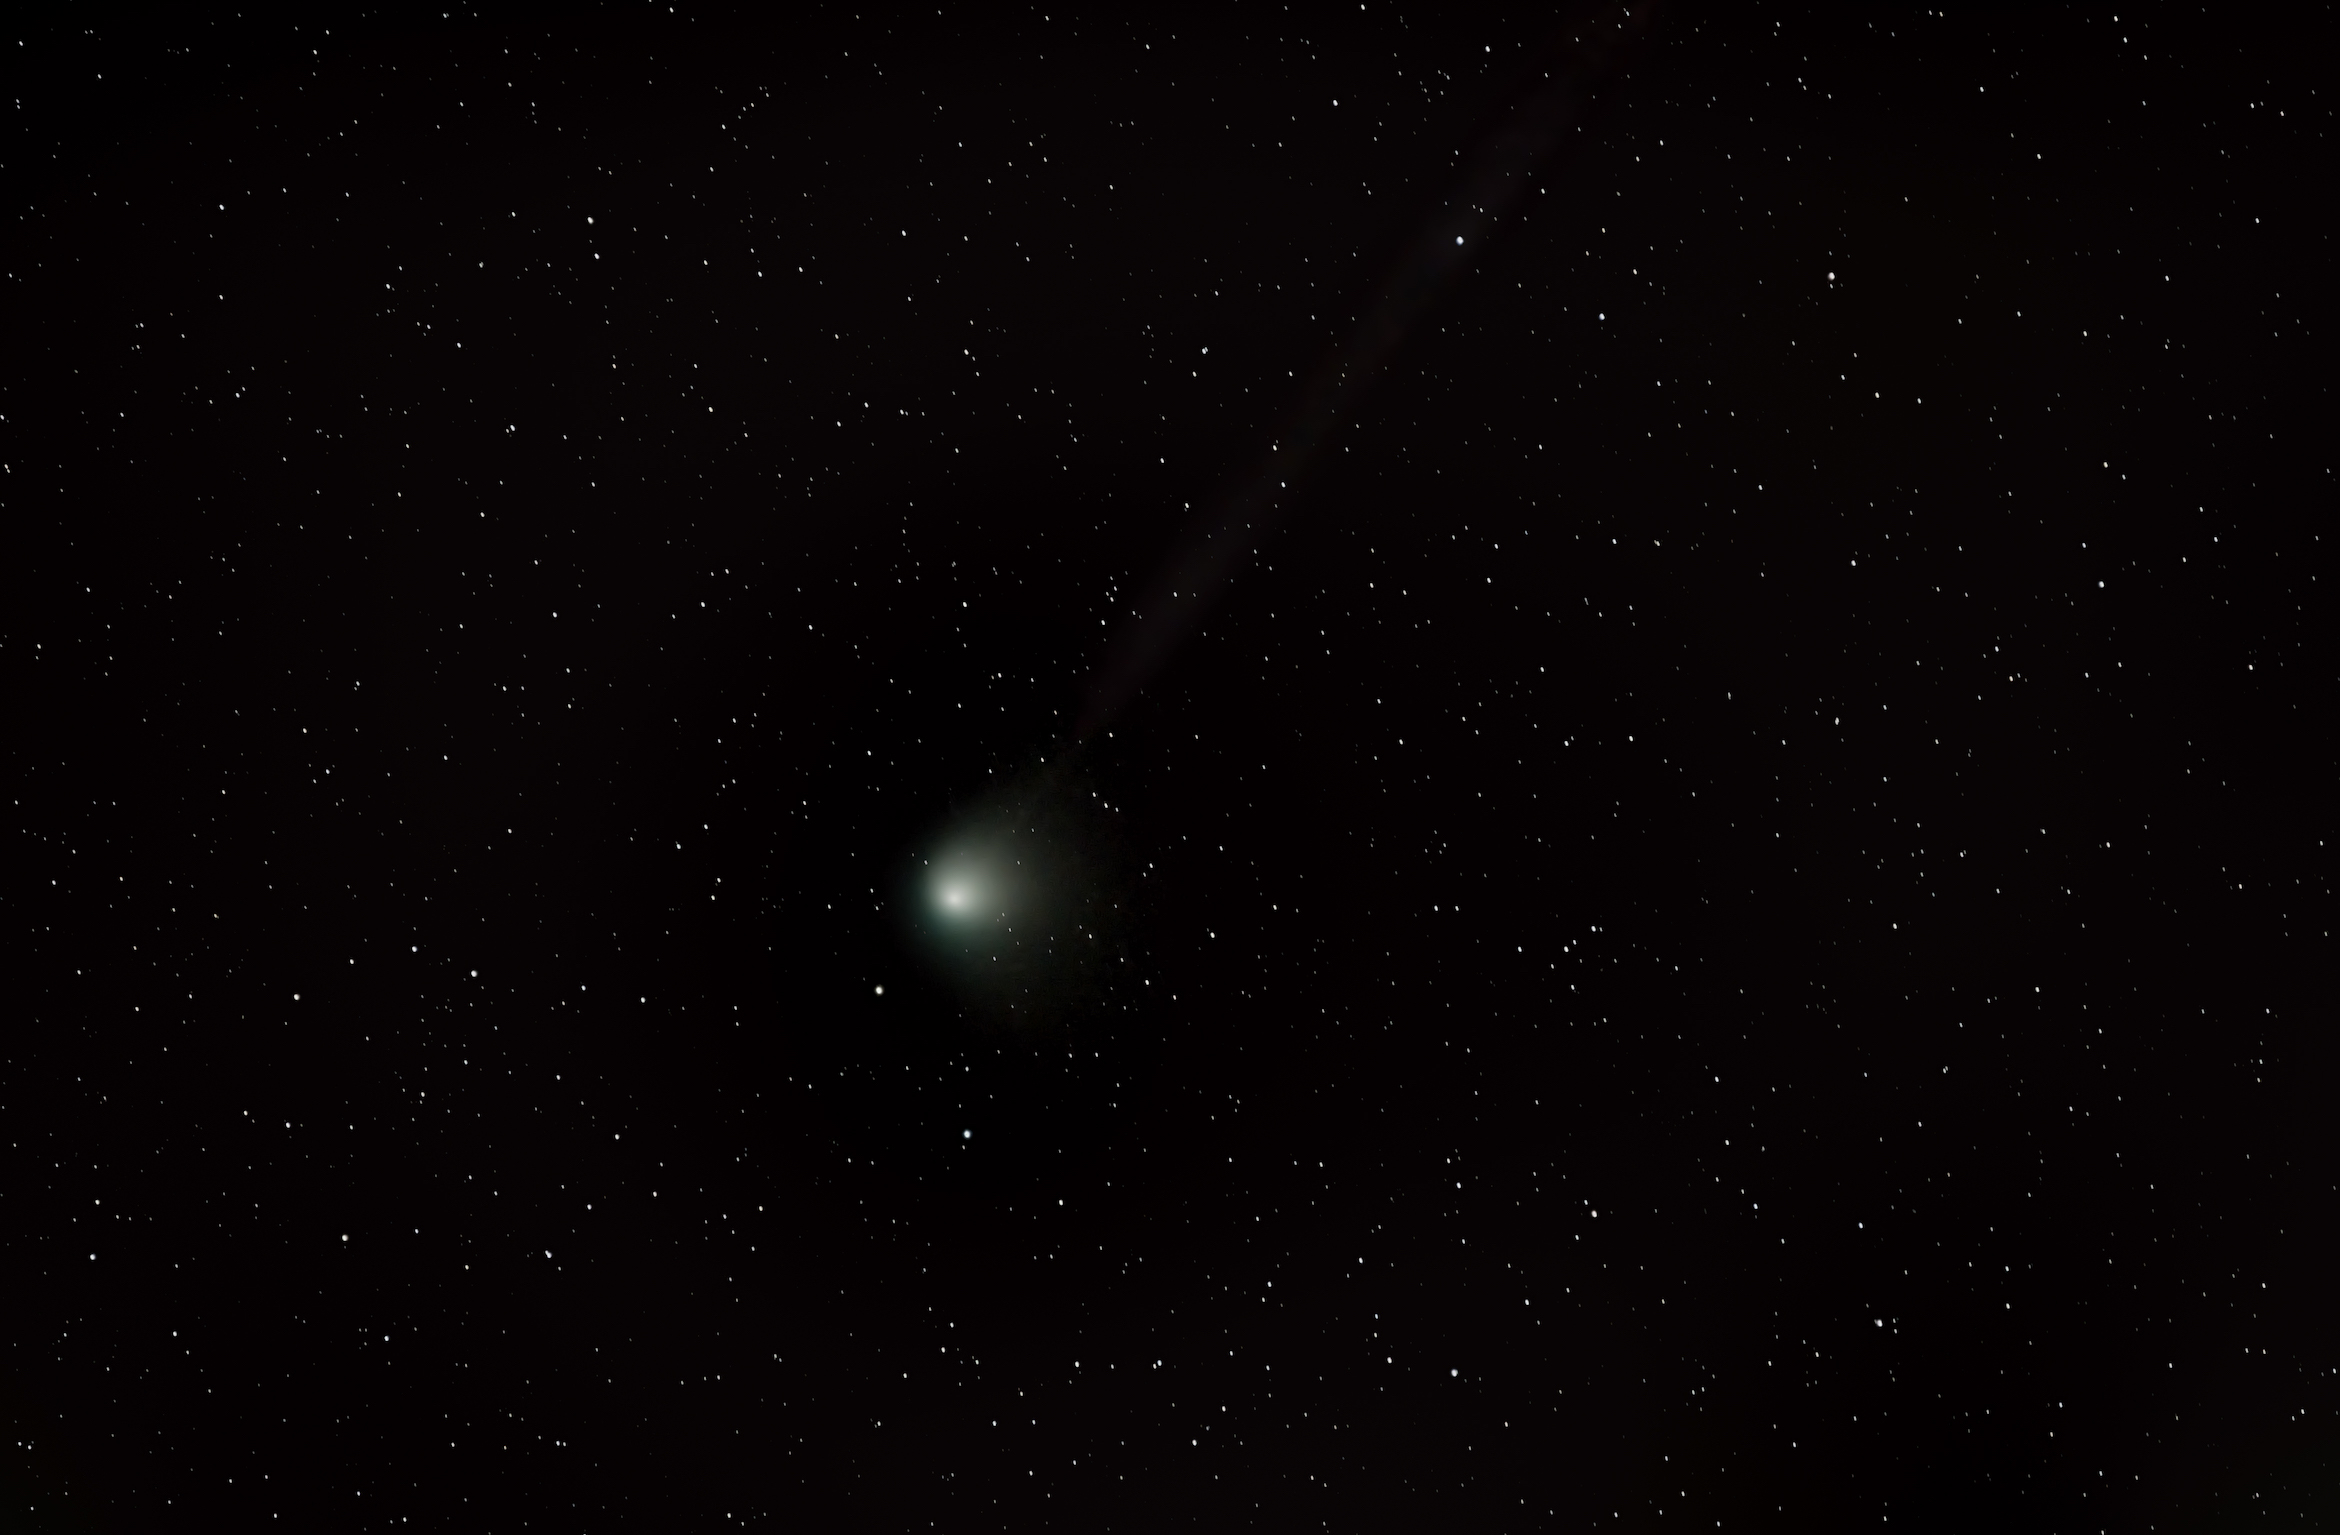
The above is a wider crop of the ISO 16,000 image.


